QuickBooks Pro/Premier/Enterprise
If you have trouble, please try our QB CSV export instructions and use our generic CSV template to import.
Hosted QB account clients: Only one colleague can download our applet for a given company and import to Track1099. Intuit does not allow an applet to be shared between users.
See a brief video of how the 1099-NEC and MISC transfer works.
Prepare to Import
Step by Step
- Generate your 1099 Detail report and ensure you see expected entries.
- After installing Web Connector, open the QB Company you wish to transfer. You must open the Company first in QB.
- Open Web Connector and click Add an Application in the lower right corner.
- Navigate to the folder to which you downloaded the Track1099 applet and select "track1099.qwc".
-
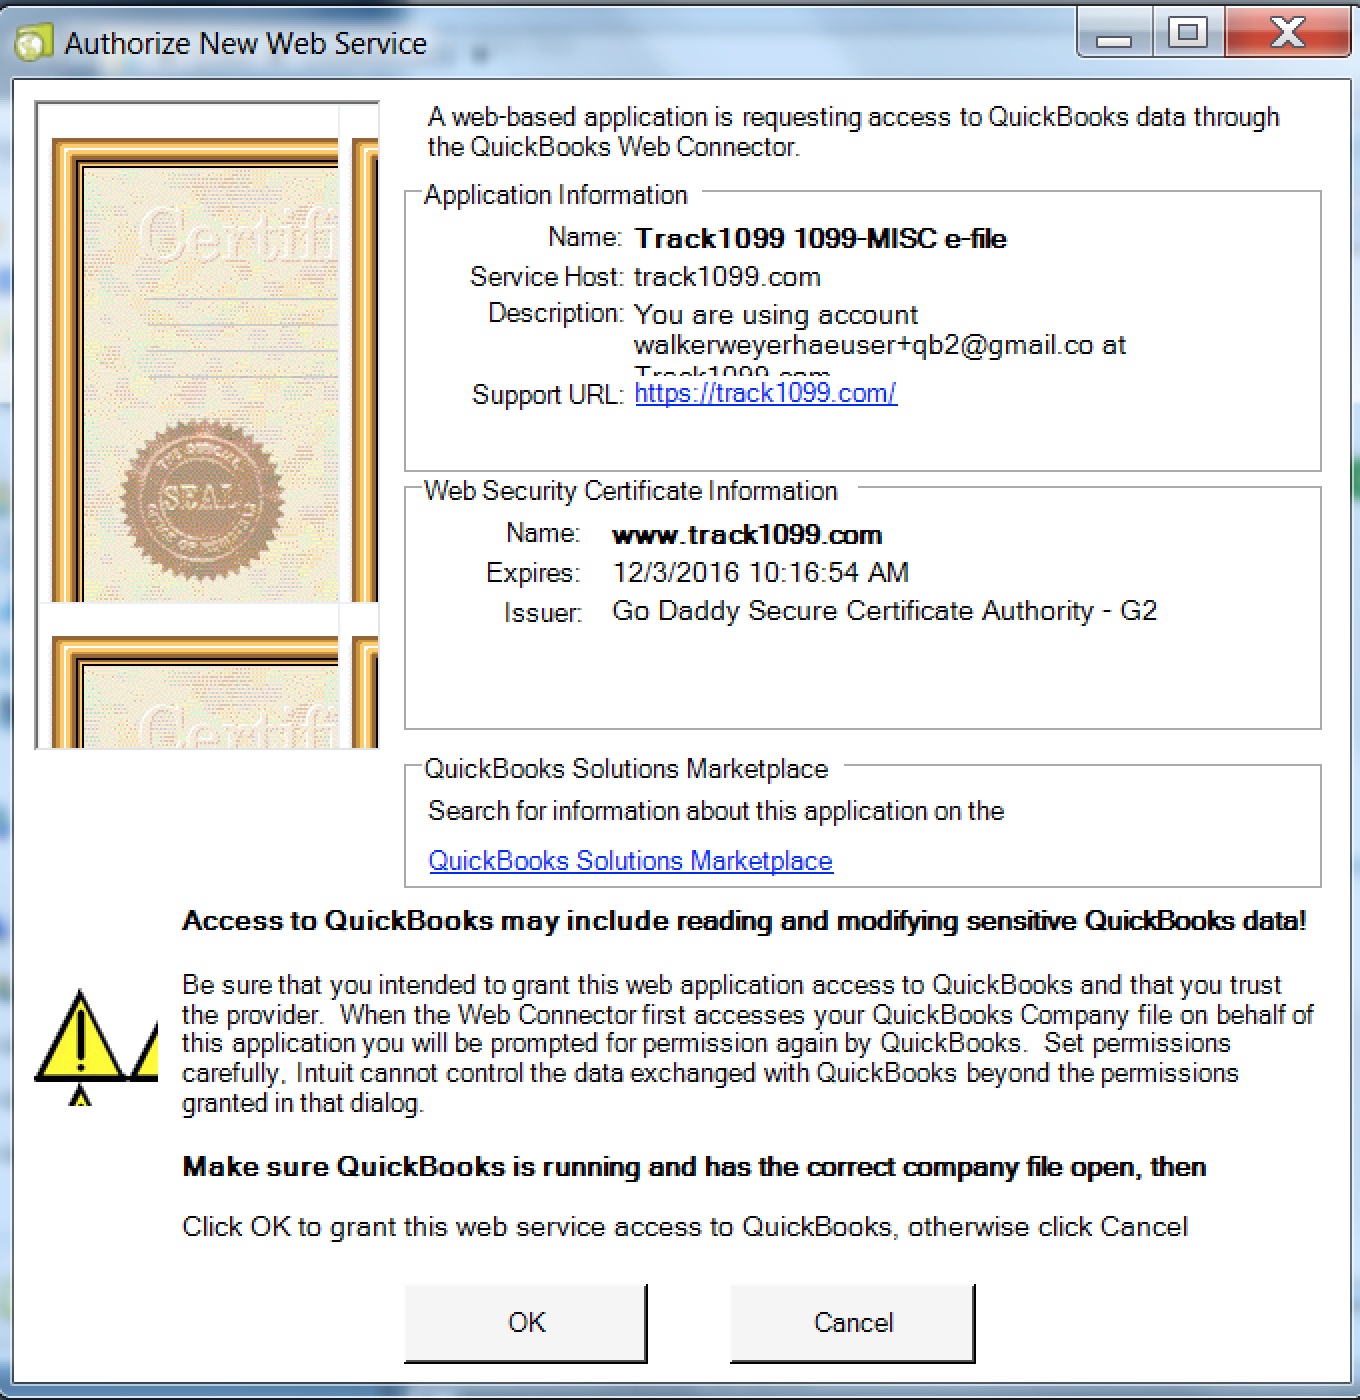
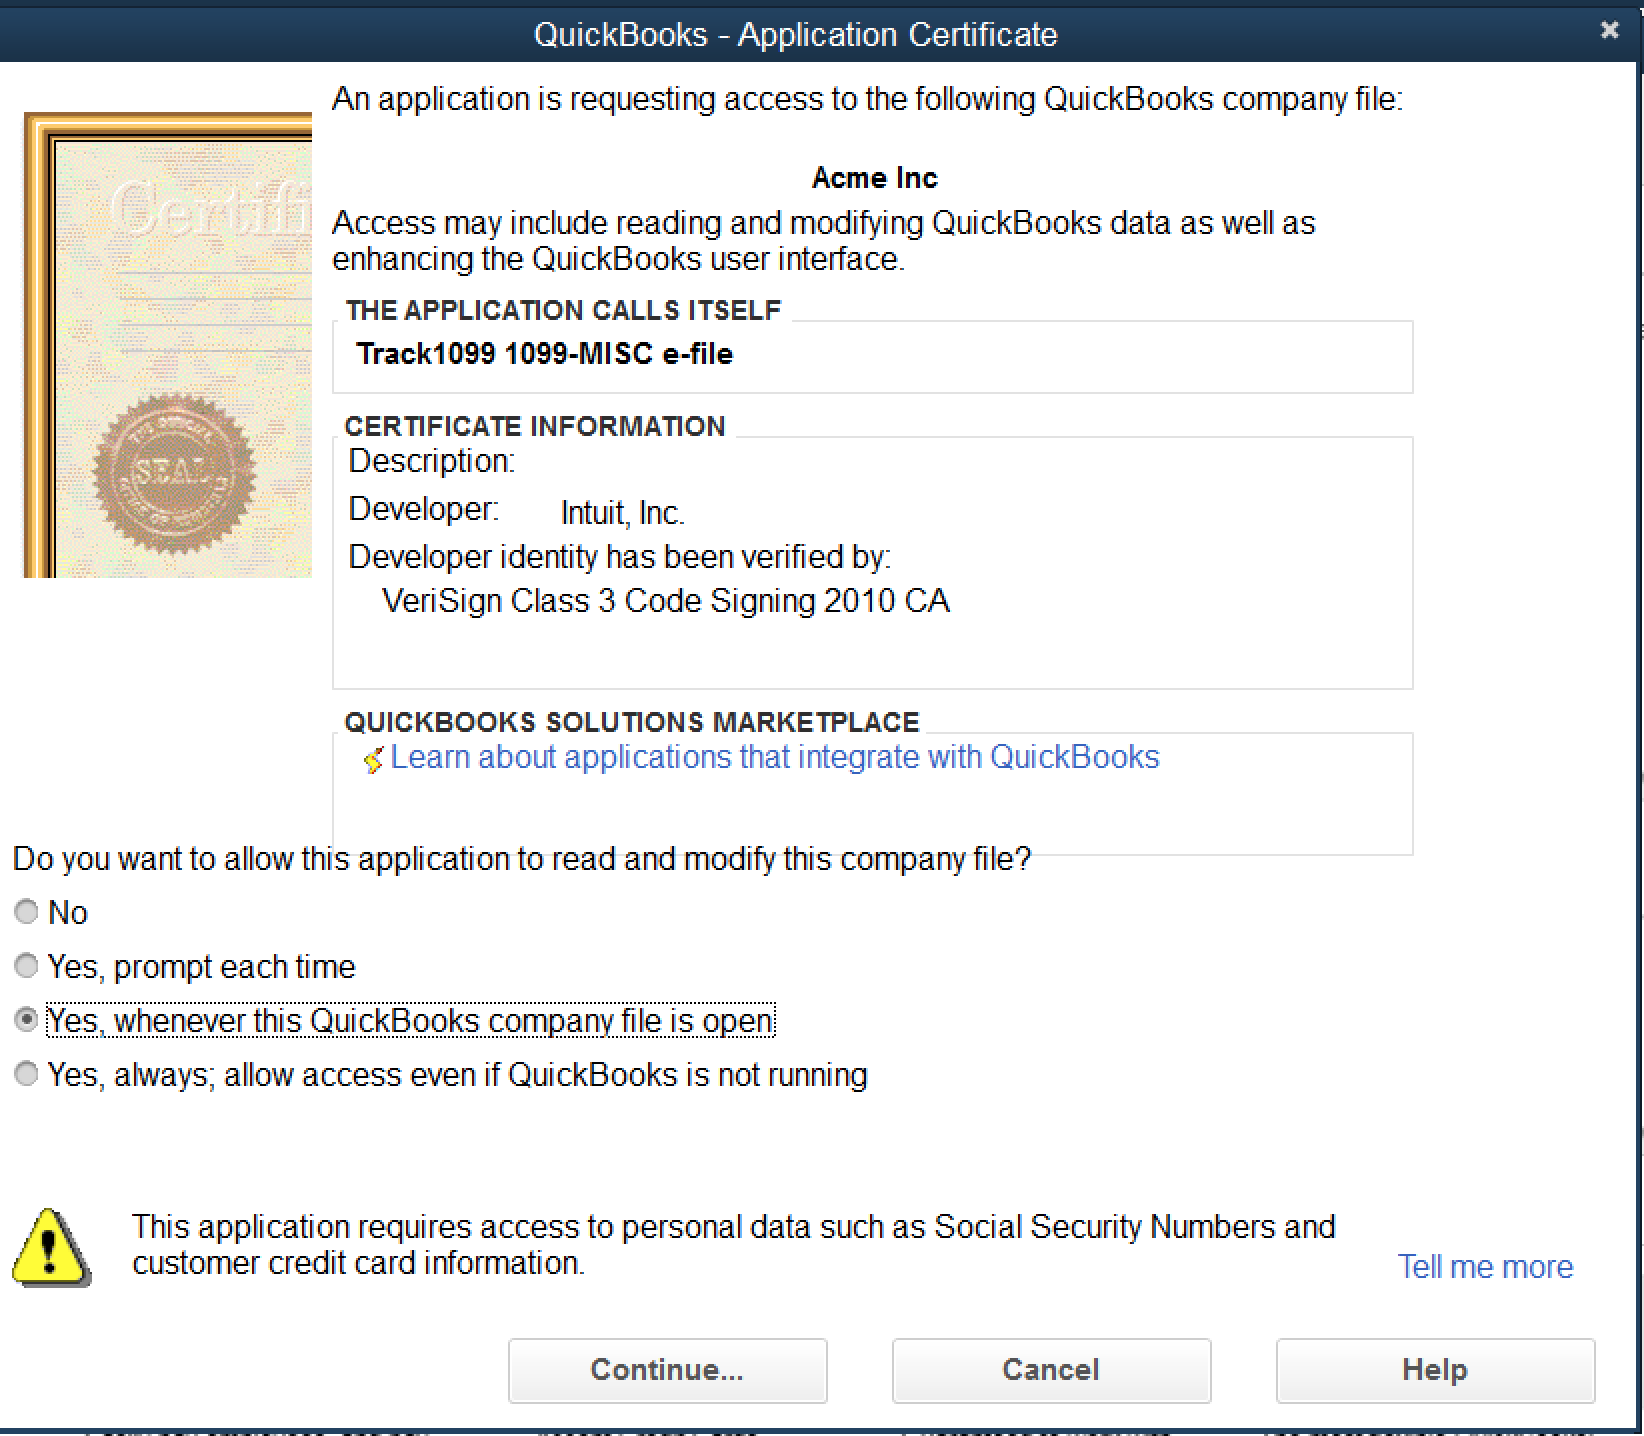
Click OK to the prompts. You'll need to check the box that allows Track1099 access to personal data such as SSNs. We cannot import Vendors if this is not checked. You'll want to select "Yes, prompt each time".
- If you get an error saying "There was a problem adding the application", please go to QuickBooks, then Edit->Preferences->Integrated Applications->Check the box next to Track1099 and authorize.
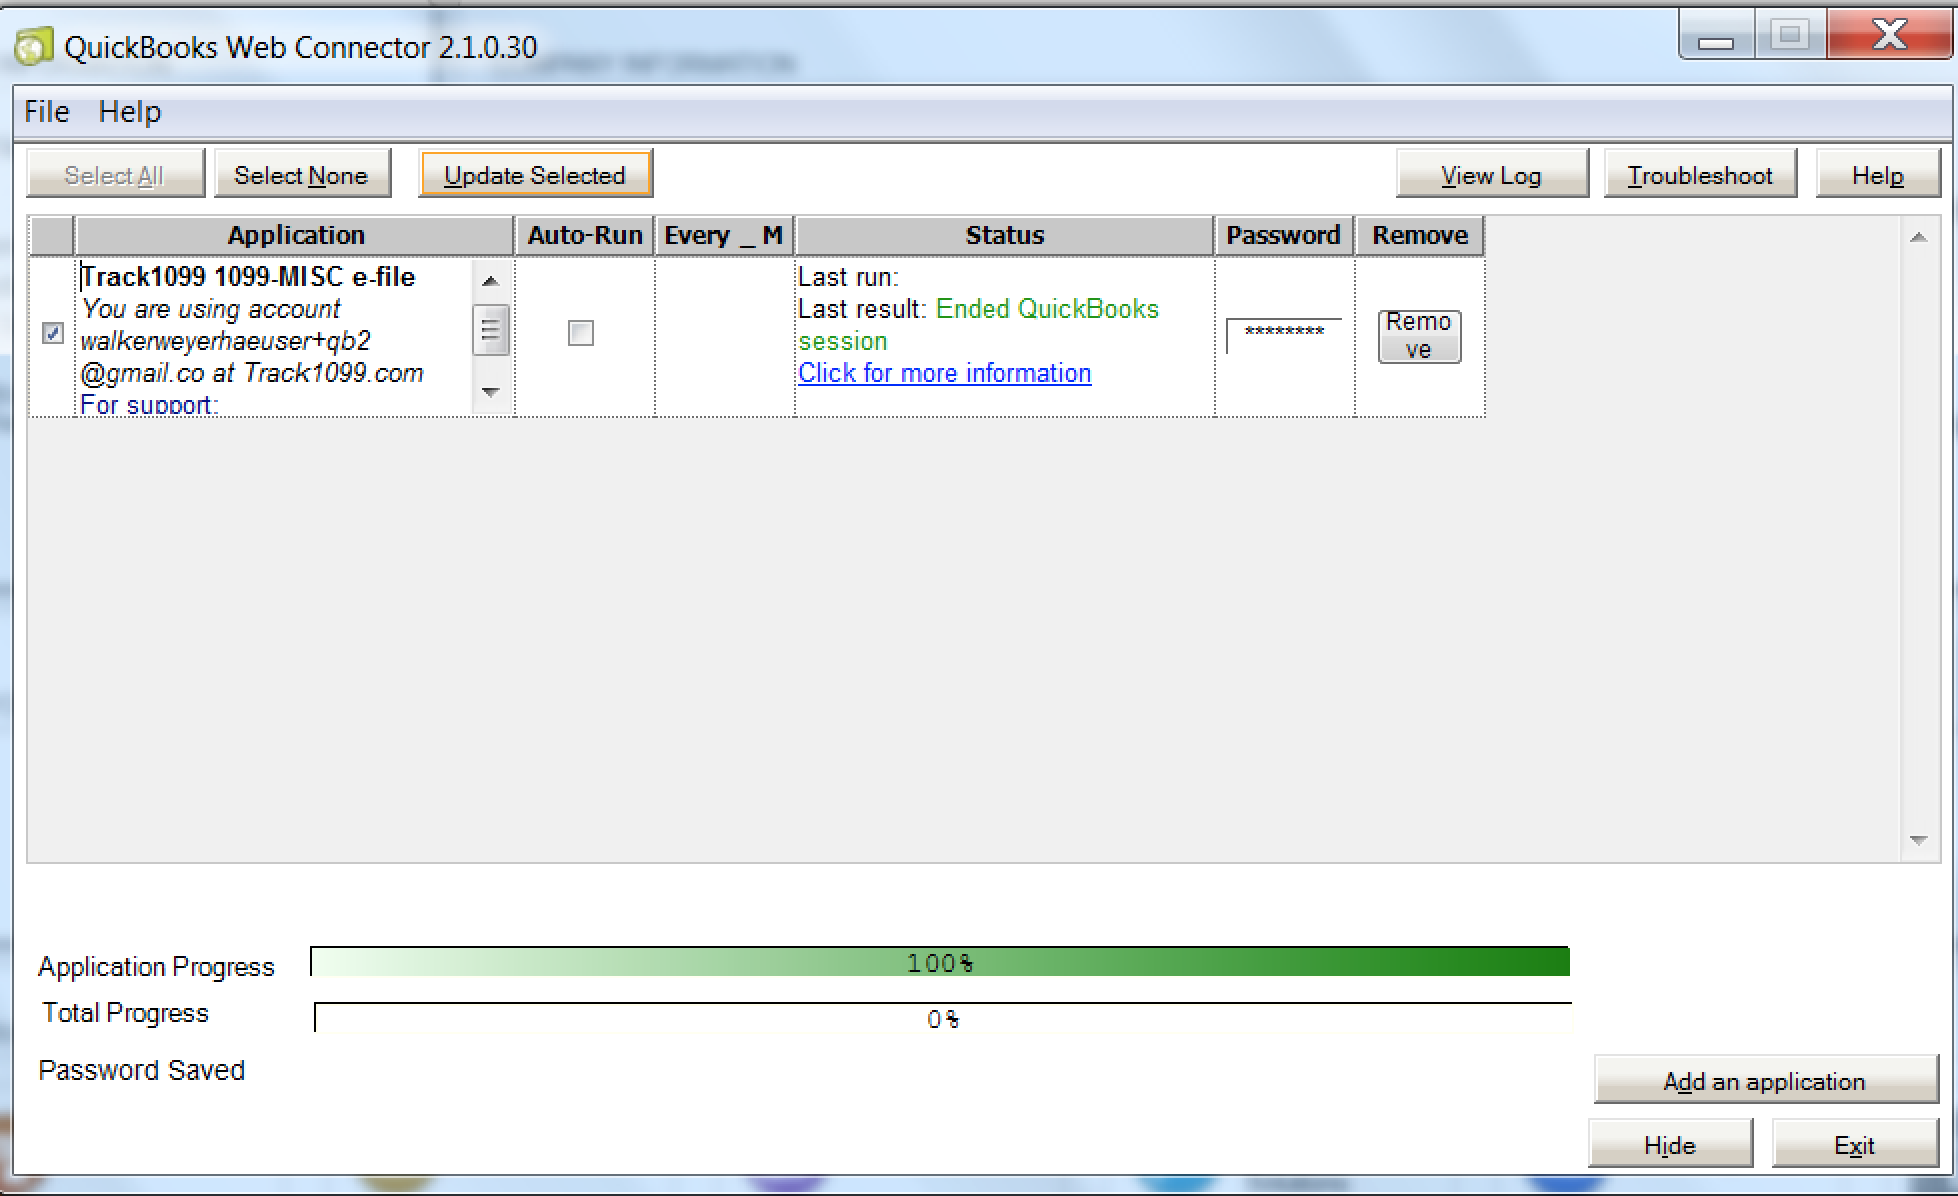
- In the QB Web Connector box, in the Password column enter your Track1099.com password.
- In the Auto-Run column, make sure the box is NOT checked. You do not want to auto-run Track1099 every time you open Web Connector.
- If you're ready to transfer data, click the checkbox in the first column of Web Connector box next to Track1099 and then the Update Selected button at the top.
- Track1099 begins uploading your data for the open company only. Only one company at a time is transferred using this process.
-
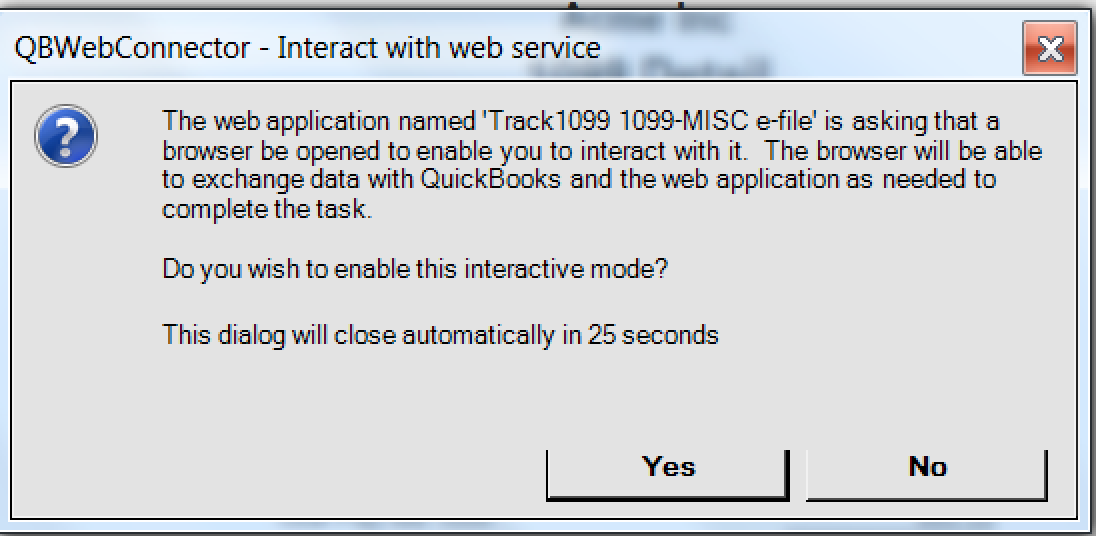
When the Interactive Mode box pops up, if you say "Yes" you will be prompted to login to your account at Track1099. This is optional. If you say "No", the download will proceed and you may login separately.
- After import is complete, another Company may be opened in QB and the process repeated.
- If you are re-importing the same Payer: a) we will only import new Recipients and b) we will NOT re-import existing Recipients or overwrite with new data. You will have to delete that Recipient in Track1099 and then re-import. You may also delete the whole Payer/Recipients in Track1099 and re-import all as many times as you wish.
After Import
Please check your Payers and Recipients to confirm they match QB.
You can re-import, but we do not re-import existing Recipients, only new ones.
You can delete any Payer or Recipient if you wish to re-import new data.
Tips & Troubleshooting
You can import multiple Payers from QB one at a time. Open each company in QuickBooks, open Web Connector, and click Update Selected button.
If you get a QBWC1039 error, this means that a second colleague is trying to use our applet that was installed for that Company by another colleague. Only the first colleague who installed our applet may use it to import.
If you have issues, please use our CSV template and these QB CSV export instructions to import.